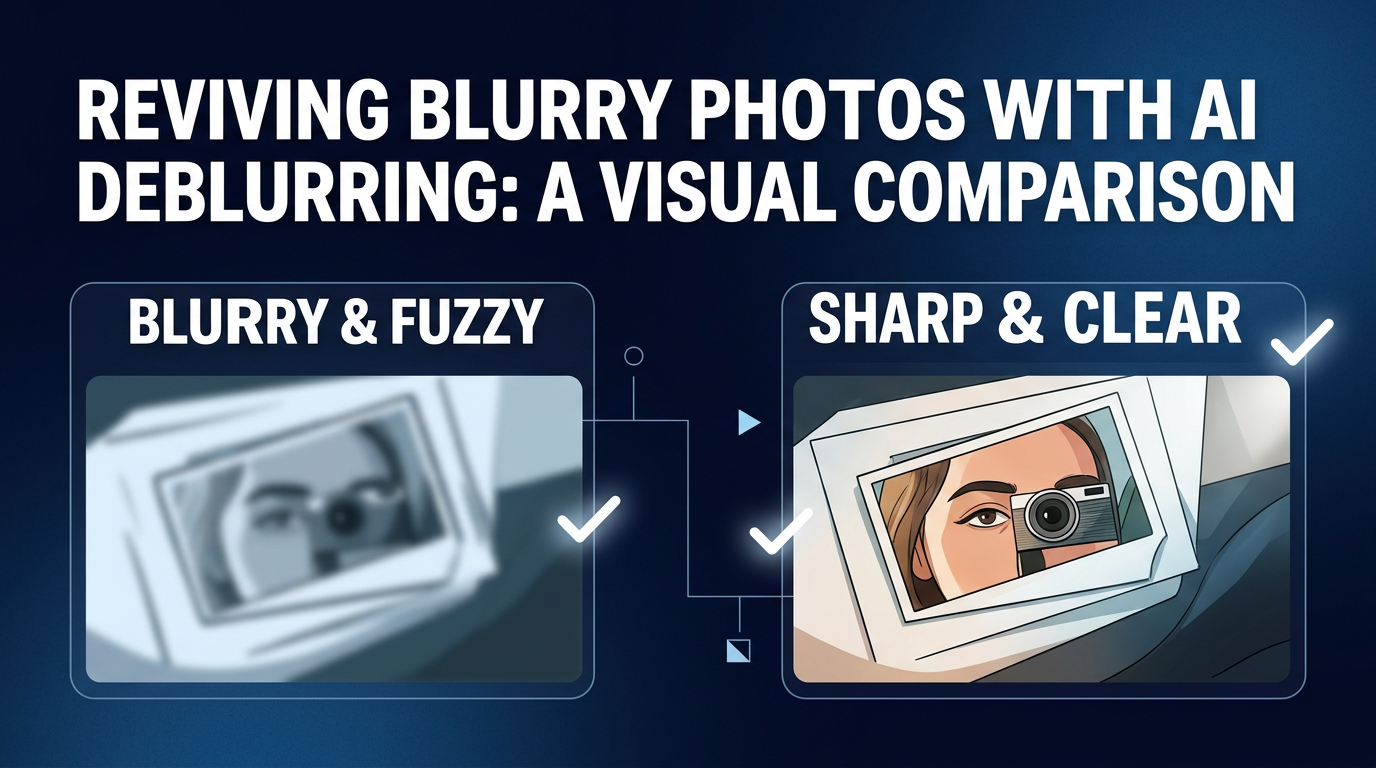
How to Unblur an Image and Bring It Back to Life with AI
A practical guide to unblurring photos with AI. Understand blur types, what deblur can and can't fix, when to upscale, and a step-by-step ImageUpscales workflow for sharp, natural results.

Blurry photos can be heartbreaking, but modern AI tools make it possible to recover surprising amounts of detail. This guide explains the three main types of blur, what AI deblurring can and can't fix, when to combine deblur with upscaling, and a step-by-step workflow using ImageUpscales so you can restore images quickly and naturally.

Try ImageUpscales free
Upscale your photos in seconds — sharp, natural results, no signup needed for your first try.
Upscale a photoTypes of blur: motion, focus, and low resolution
Understanding the cause of blur helps you pick the right AI settings. The three common types are:
Motion blur
Motion blur occurs when the camera or subject moves during exposure. It often creates streaks or directional smears across the frame. Small, short-direction motion can be corrected well; extreme long streaks may be only partially recoverable.
Focus (defocus) blur
Defocus blur comes from incorrect focus or a very shallow depth of field. Edges are soft but not streaked. AI models can reconstruct edges and textures convincingly in many cases, but very large out-of-focus areas with no high-frequency detail remain challenging.
Low-resolution / pixelation
Low-res images lack fine detail because they contain fewer pixels. Upscaling introduces detail the model predicts. AI upscalers are particularly effective here, especially when combined with deblurring to sharpen edges before enlargement.
What AI deblur can and can't fix
AI deblurring is powerful, but it's not magic. Knowing its limits helps set expectations and choose the right workflow.
What AI handles well
- Short to moderate motion blur and mild defocus. AI can reconstruct edges and textures, producing sharp, natural-looking results.
- Noise and mild compression artifacts—many deblur models include denoise components.
- Low-resolution images when paired with intelligent upscaling to add plausible high-frequency detail.
What AI struggles with
- Severe motion blur where subjects are stretched beyond recognition; the original detail is gone and reconstruction becomes a best-guess.
- Areas with zero information (heavy clipping or massive sensor noise).
- Exact replication of very fine textures when the source lacks any reference detail—AI will synthesize plausible texture, not the original.
When to combine deblur and upscale
Combining deblur and upscaling often gives the best results for small or soft images. Use deblur first to recover edges and reduce smear, then apply upscaling to add resolution. Upscaling before deblurring can amplify artifacts and smear—so reserve that sequence for rare cases.
Common scenarios to combine the two:
- Low-res portraits that need both sharper facial features and larger dimensions for printing.
- Action shots with mild motion blur that also require cropping and enlargement.
- Archival scans that are both soft and small—deblur to restore structure, then upscale for clarity.
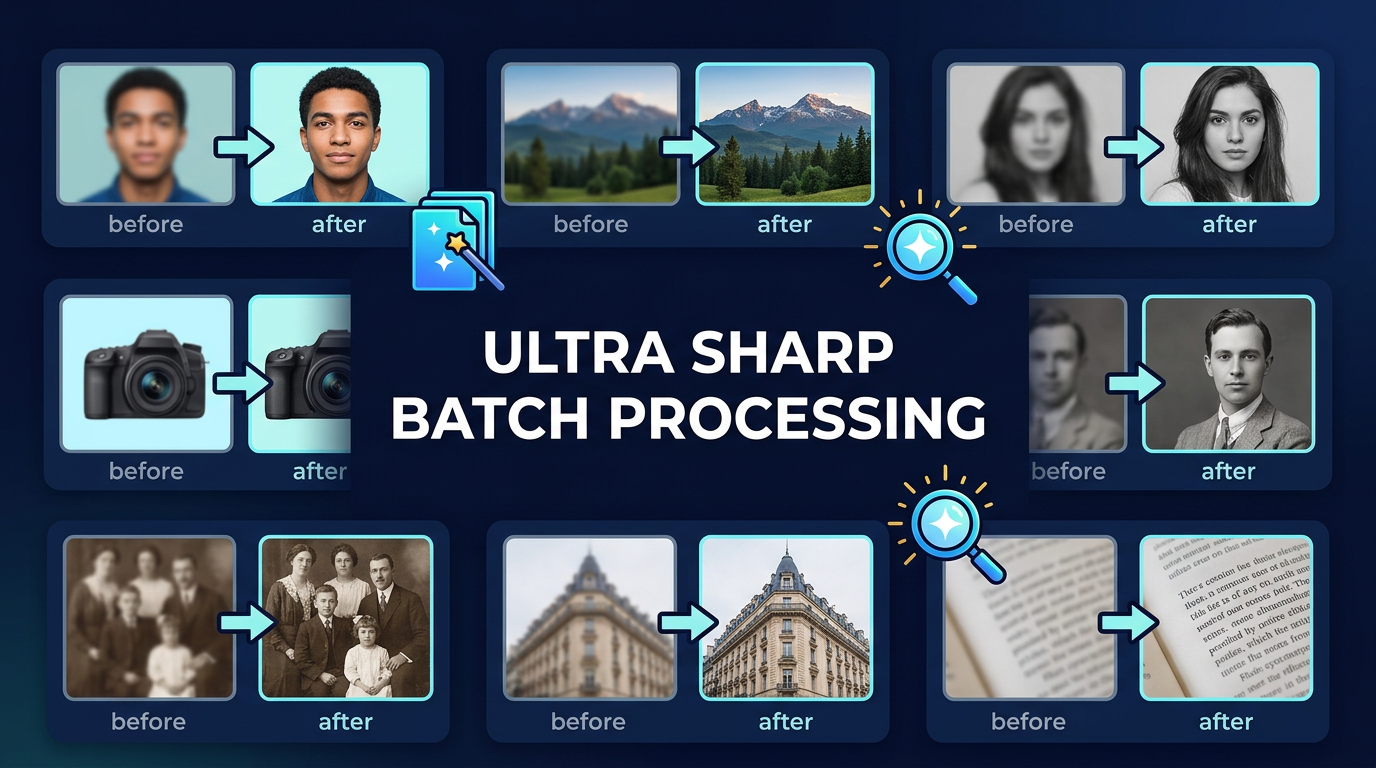
Step-by-step workflow using ImageUpscales
ImageUpscales provides fast AI upscaling, batch processing, and sharp natural results—making it ideal for deblur + upscale workflows. Here's a practical process you can follow.
1. Assess the image
Open the image and identify the blur type (motion, focus, low-res) and problem areas. Note compression artifacts and noise that may need denoising.
2. Make a backup
Always work on a copy so you can compare results and revert if needed.
3. Start with deblurring
Use ImageUpscales' deblur or sharpening model and select a conservative strength. For motion blur, choose directional-aware settings if available. Run a preview on a representative crop and toggle strengths to find the sweet spot—enough to restore edges but not to hallucinate details.
4. Denoise and fix artifacts
If the deblur step amplifies noise or JPEG banding, use ImageUpscales' denoise settings or a mild artifact-reduction pass. Keep denoise subtle to preserve detail.
5. Upscale
After deblurring and denoising, upscale using ImageUpscales' fast AI upscaling. Choose the target size (2x, 4x, etc.) and a model tuned for sharp natural results. Because deblur recovered edges first, the upscaler has better structure to work with and produces cleaner results.
6. Local refinement
For faces or text, apply localized passes: a mild face-specific enhancement for portraits or selective sharpening for text and logos. ImageUpscales supports batch and per-image adjustments so you can fine-tune critical shots.
7. Batch process
When restoring many photos, use ImageUpscales' batch processing to apply consistent settings across an album. The platform's speed keeps the workflow efficient—process dozens of images in minutes rather than hours.
8. Compare and export
Compare the original and final versions at 100% zoom. If necessary, iterate: dial back deblur or denoise, or try a different upscaling model. Export in a high-quality format (PNG or high-bitrate JPEG) to preserve the improvements.
Practical tips and safety
- Keep expectations realistic: AI predicts plausible detail; it doesn't recreate missing unique features exactly.
- Shoot with the highest native resolution you can; AI performs better with more source information.
- For faces, use portrait-focused models when available to avoid odd textures.
- Keep a copy of the original and document your settings so you can reproduce successful results.
Frequently Asked Questions
Q: Can AI remove extreme motion blur completely?
A: Not always. Short to moderate motion blur is often recoverable; extreme streaking usually means much of the original detail is gone. AI will produce a plausible result, but it may not match the unseen original perfectly.
Q: Will deblurring make a photo look artificial?
A: Overaggressive settings can create unnatural sharpening or texture. Use conservative strengths and compare at 100% to ensure results look natural. ImageUpscales focuses on sharp, natural results to avoid that artificial look.
Q: Should I denoise before or after deblurring?
A: Generally, deblur first to restore edges, then denoise lightly. Deblurring can amplify noise; a post-deblur denoise pass usually yields better balance between clarity and smoothness.
Q: How do I handle small batch jobs efficiently?
A: Use ImageUpscales' batch processing. Create a preset with your deblur, denoise, and upscaling settings and run it across the set. The platform's fast AI upscaling makes batch runs practical and quick.
Q: Can AI restore faces that are badly blurred?
A: AI can improve soft or mildly blurred faces, often producing convincing, natural-looking results. But when facial features are fully streaked or missing, reconstructions are approximate and may lack original nuance.
Conclusion
AI has made unblurring photos far more accessible. By identifying blur type, starting with deblur, then denoising and upscaling, you can recover images that once seemed lost. ImageUpscales combines fast AI upscaling, batch processing, and models that emphasize sharp, natural results—perfect for photographers, archivists, and content creators who need reliable restoration. Try the workflow above on a few test images, iterate on settings, and you'll often be surprised at how much life you can bring back to a blurry photo.